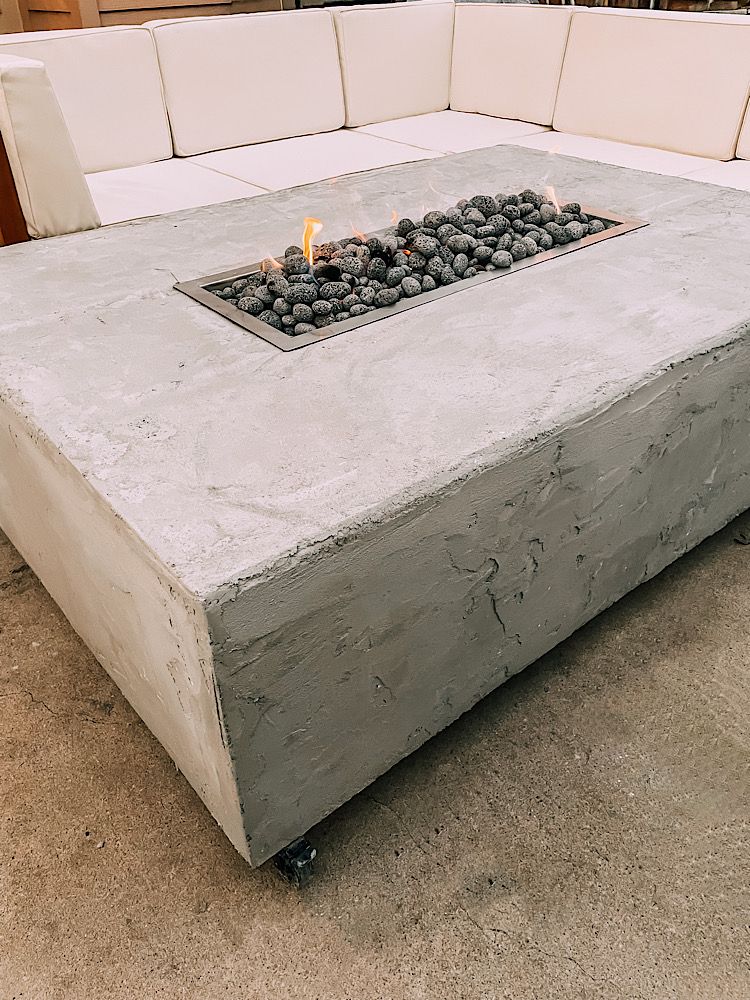
WOW!!! I have never received so many requests for a tutorial so fast, as I did when I shared the DIY concrete fire pit Kev made for us. In all honesty, I thought he had found a how-to tutorial somewhere online and that sharing the instructions with y’all would be as easy as posting a link. How wrong I was; this amazing handyman of mine (aka husband) totally winged it!!! He never ceases to amaze me. I was fully prepared to buy one online, but he was adamant that he could make one himself. I’m SO glad I agreed, because the ones you can buy are outrageous!! We ended up saving ourselves thousands of dollars.
As requested, here is your how-to for a DIY concrete fire pit!
Materials
Before you begin, you’ll nee the following:
4x4x8 Pressure-Treated Timber
2x4x8 Ground Contact Pressure-Treated Lumber
Lava Rocks (or Fire Glass)
Concrete Bonding Adhesive and Acrylic fortifier
60lb Sand Mix (if you want a white cement, find a white sand instead of mix)
92.5lb White Portland Cement Concrete Mix
4 3×5 Cement Boards (we used 3 but it’s good to have an extra just in case)
Gas Ball Valve
Natural Gas Hose Kit
3in Star Flat-Head Wood Deck Screws
3in Connector Screw
1in Cement Board Screws
London Brick Trowel
Margin Trowel
Stainless Steel Edger
Wood Float
2 x 1 1/2 x 1 3/8 Galvanized Angle
Steel Swivel Plate Caster – 300lb Capacity
Sealing PTFE Plumber’s Tape
Fire Pan
Concrete Sealant
Total: $565
*In some markets you can find this cement product, which would save you the step of having to create your own like we did.
You will also need the following (but most people have this so I did not include in the cost):
Drill
Mixing Paddle for Drills
Wood-Cutting Saw
Utility Knife/Box Blade
Tarp (better than drop cloth) wider than the table you’re building
Old Shovel or Gardening Hoe
Water Hose or Spray Bottle
Level
Safety Goggles
Mask or Respirator
Gloves
Wear long sleeves and pants (and make sure they’re ok to be trashed)
Framing
Measure how high you want your fire pit to be. If you plan on putting it on wheels like we did, count that in to your measurements. Cut 4 4×4 (the corners) as tall as you want the table. Do not add wheels until later. I suggest making it knee height when sitting down on your patio furniture, or in line with the seat.
The fire pan will sit in the middle of your table, so trace the outline onto paper (like creating a cheat sheet/stencil outline for the sizing). You’ll eventually use this to size out the middle.
Then measure how much table space you want on each side. Keep in mind the 4×4 will add 3 inches to your width/length, so you’ll want to size it 6 inches shorter in total, because the wood beams will make up that space.
Your frame will be made out of 4 rectangles (or squares) – one on each side. Each rectangle is made of two 2×4 horizontal beams and two 4×4 verticals. The corners will support two rectangles each, so in total you’ll need 8 horizontal beams and 4 vertical.
Lay the vertical table leg posts on the ground, perpendicularly. Using the 90 degree angled brackets, secure your horizontal beam lined up with the top and bottom of the vertical beams. (Do and don’t photos for reference). If your beams are cut identically, you shouldn’t have to worry about leveling the horizontal piece. But…better safe than sorry 😉
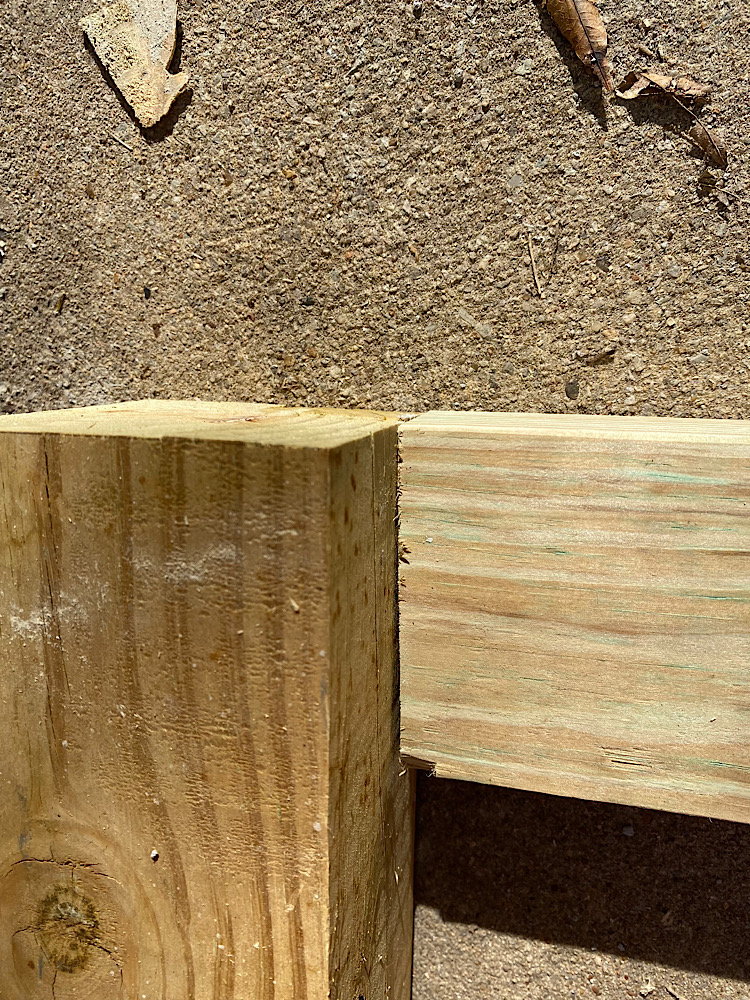
DO 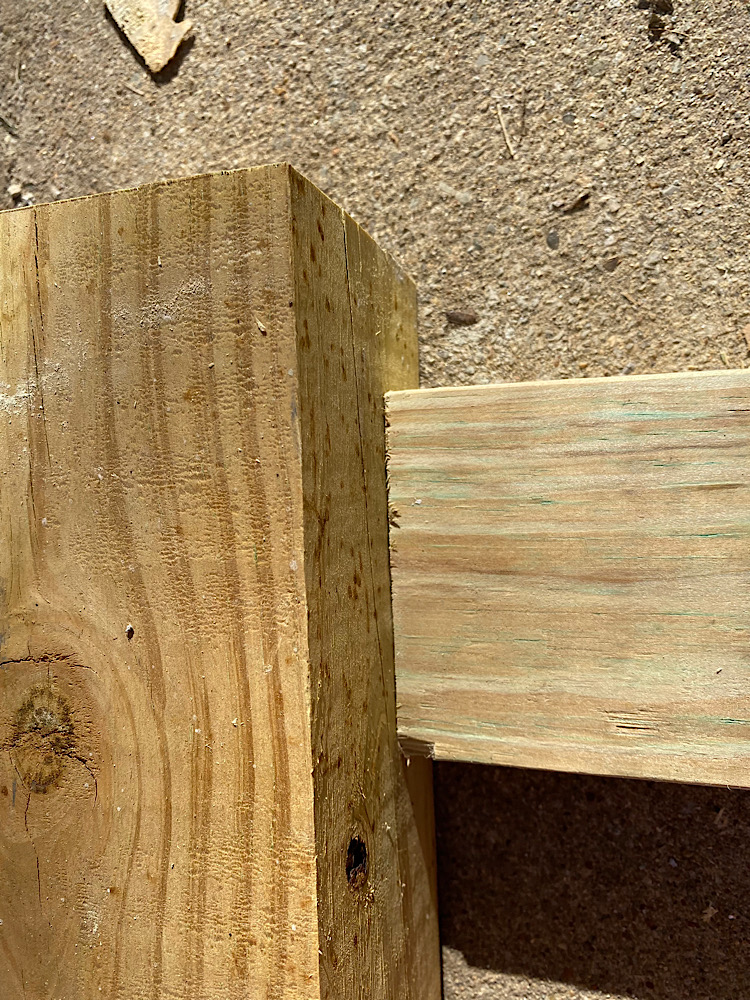
DON”T
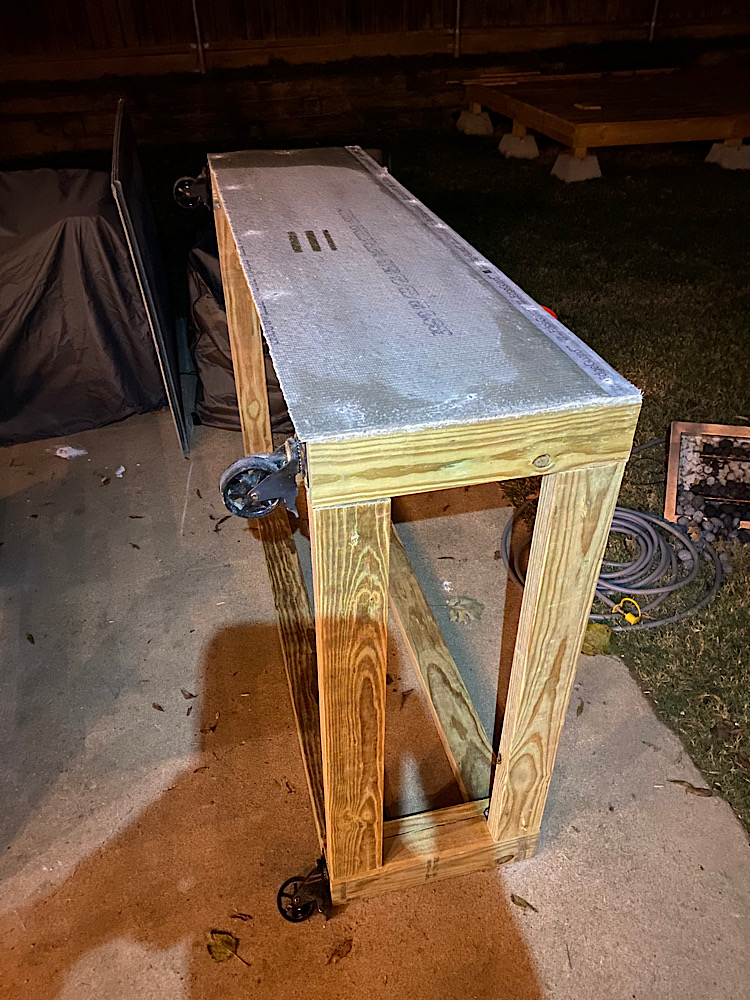
Once you have your first rectangle/square built, you’ll stand it up and continue adding more wood beams to it, in order to create the second, third, and fourth sides. By the end of this step, you’ll have a box frame that looks like this:
The 90 degree brackets will naturally pull the corners of your beams in, so adding the 3 inch deck screws through the outside of the 2×4 into the 4×4 post will give it the additional support it needs to close the gap.
Now you can attach the wheels to the bottom using the 3 inch screws.
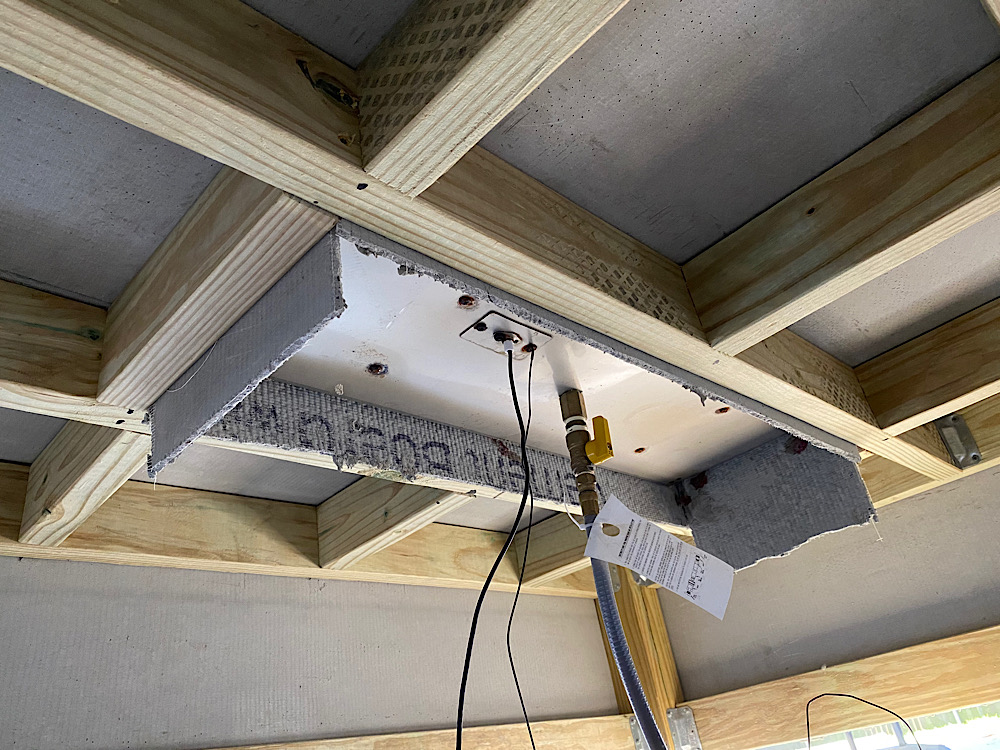
IMPORTANT: if you are not adding wheels, you must create some openings on each side at the bottom of the walls to allow air to enter underneath the table. If you bought a fire pan with an igniter, you can plan for a cutout in one of your side walls to hold it, or you can attach it to the bottom (with wheels you should have enough clearance on the bottom to do so).
*It is imperative that everything is level. Take extra time and care on your cuts, and check leveling as you go.
Build the Walls
Secure the cement board to each side of your frame, making walls around it. Screw the board into your wooden frame using the cement board screws. When screwing it in and rotating the frame, it’s good to do it over a soft surface like grass instead of a concrete floor (this is to limit the pressure being placed on the boards to prevent snapping).
With your box blade, cut the excess board from the under/back side, using the wooden frame posts as your guide. The board edge needs to be completely flush with the framing to create smooth corners.
Build the Top
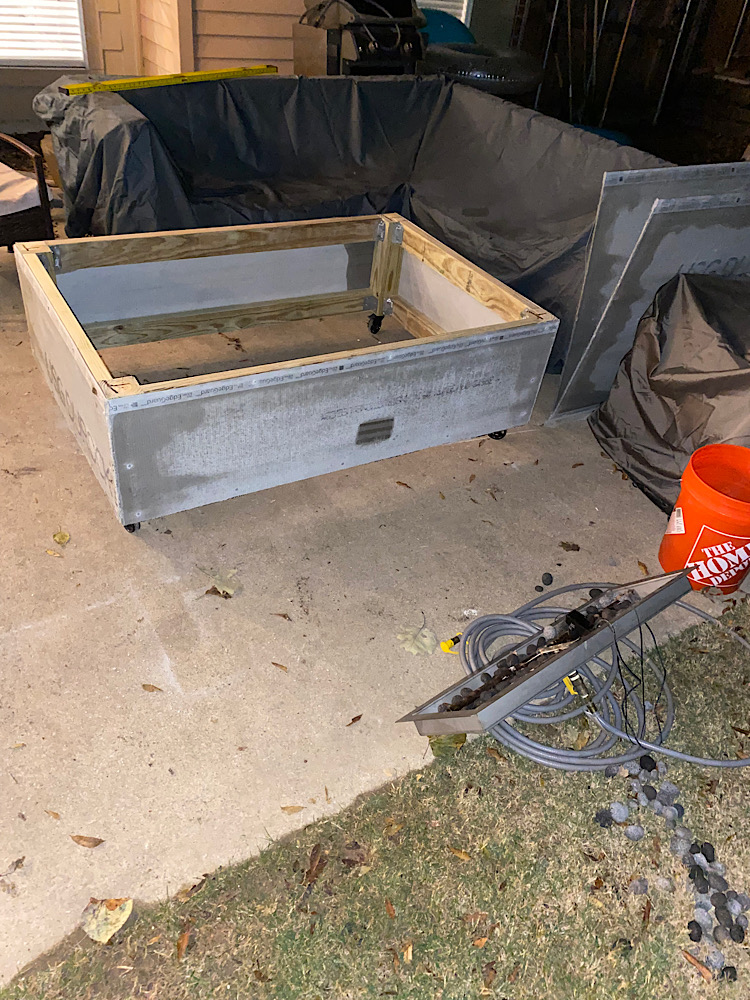
Using 2×4 beams, cut two the long length of the table for the inside which will support the fire pan. You are essentially building a grid for the top that will be strong enough to support the top of the table.
Attach the 2x4s close to the center, with enough room for the fire pan to drop in between. For example, the base of our fire pan is 10in wide, but the surface-level lip is 12in. The cement board we’ll be adding between the pan and 2x4s (to protect the wood from the heat) is about 1/4in. So, our 2x4s were spaced 11in apart to allow enough room for the base to drop in.
Secure the long-ways 2x4s using the 3in deck screws, which will go through the exposed side of the cement board into the 2x4s. You must have at least two screws supporting each 2×4, per side. You’ll want to place them vertically on top of each other (one to support the top and one to support the bottom of the 2×4) to keep it from rotating. Reinforce these beams with 90 degree brackets on the inside. One bracket per “corner”.
Now that you have your long-ways 2x4s secured, you’ll need to measure the shorter-ways 2x4s, cut, and secure. These will make the top frame look like a grid, and these shorter pieces are completing the rectangle that surrounds the fire pan drop-in. Again, make sure you account for the 1/4in width of the cement board.
Make 3 more short cuts for each side of the top (6 total, but do them one side at a time because one side might have a slight variation in sizing). Secure them using deck screws. The top of your table will be heavy with the cement board, so this step gives you the extra supports needed in order to carry that weight.
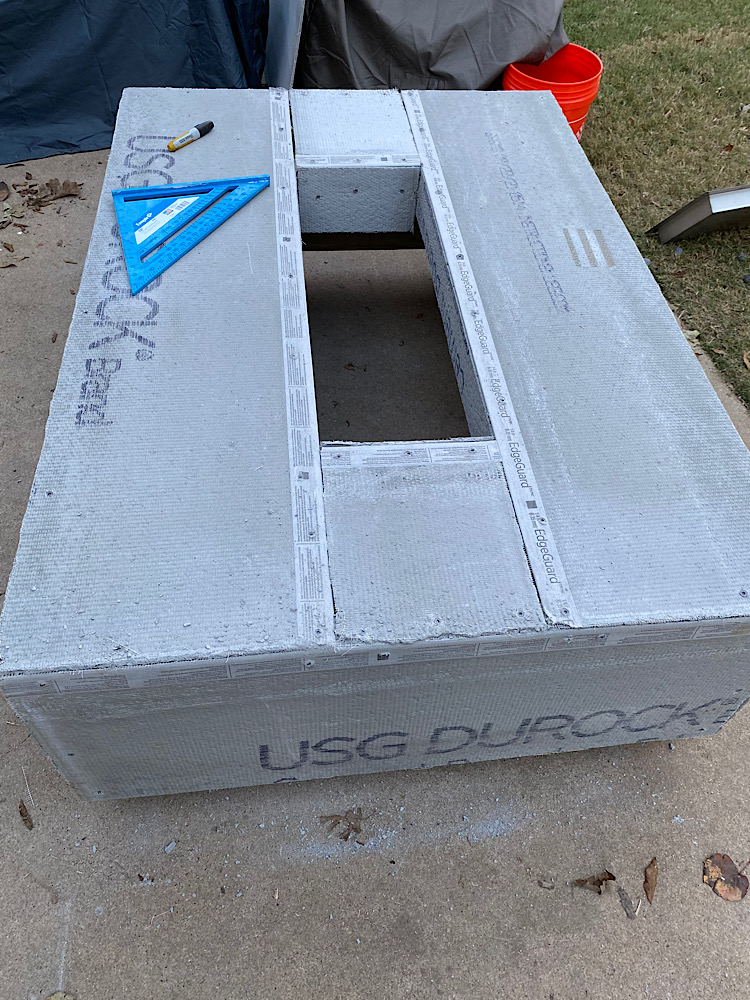
*Your fire pan has NOT dropped into the table yet, despite what the photo shows.
Now you can screw in the cement board to the top grid with cement board screws, to create the “table”. This is easier done on it’s tall, vertical side, so rotate the frame up on grass. Ensure the cement board is covering all wood where the fire pan will drop in. You do not want any wood touching the fire pan. You can use scraps to line the center. If you need to make additional cement board cuts to add in, go for it!
*If your table is smaller than one cement board, you can attach one board to the top and cut out the center after screwing it in (this prevents snapping). Ours was (accidentally) larger than expected, which is why our cement board was added in sections.
Now you have a table built! If you’re tired or running out of time, this is a good place for a break. The next step is cement which is messy, tiring, and takes about 1-2 hours of physical work.
Concrete Mixture
It’s time to cement the exterior! Be sure to do this part of the project on top of your tarp.
Option 1: Buy surface bonding cement. Not all markets carry this option, so if that’s the case (like in our experience) you’ll need to do option 2.
Option 2: Make your cement mixture in a sturdy, disposable container or bucket (at least 5 gallons). The mixture is 1-to-1, so half white cement and half sand. You do NOT need to add any gravel to this mixture. Mix it together so it’s naturally combined – no liquid yet. It’s going to get dusty, so make sure you’re wearing your goggles and mask.
If you’ve ever worked with cement before, you’ve had to add water. For this project, however, you will only use the cement bonding agent (NOT water). With the mixer attached to your drill, pour the bonding agent into the concrete mix while simultaneously blending with the drill. You want this to become a creamy, cake batter consistency. If it gets too runny, add more sand. The reason you want it thinner than normal concrete mix is because you are essentially plastering it on (as opposed to pouring a sturdy cement structure like a counter top or sidewalk).
If your mixture is too thick at first, or your drill isn’t strong enough, you’ll use your shovel to help mix and turn it over.
*Kevin’s commentary, “Alright you might want to tell them that life’s about to suck.”
Concrete Application
You’re going to make a mess – make sure your area is clear of anything valuable or in need of protection.
Mist the cement boards/table so that it is wet, but not dripping or puddling – this is required to bond the concrete mixture to the boards.
If you have about 4 gallons of mixture (2lbs white cement, 2 lbs sand, which is what Kev was able to make in his 5 gal bucket) this will be enough for one side wall and the top, or 3 side walls. So yes, you’ll end up making two batches of concrete.
Walls:
Using your two trowels, you will begin applying your concrete. With the larger trowel, scoop the concrete and apply it to the top of your wall. You’ll do this in smaller sections about the width of your large trowel. With the smaller trowel, you can spread it out. Gravity will make it fall down the wall a bit, you can use the trowels to make sweeping/spreading movements going bottom to top (upwards). You must do it upwards so that it evens out against gravity. This is similar to steps like painting and plastering – not traditional concrete work. Kev wants me to add that you cannot be a perfectionist or be worried at all about how it looks during this step. There will come a point later where you can smooth it out. At this time, just make sure everything is covered. It won’t seem/feel like you’re adding much of anything, but you’re doing great sweetie!
Fill the gaps where the cement boards meet (the seams). You’ll need to add quite a bit to these corners (more than the level surfaces) – that’s totally normal. It should look thicker and messier in these corners – pack it in baby!
When you do run out of mixture for the first time, go back to where you started applying and begin smoothing/shaping. You can use your large trowel and the wood float to smooth, shape, etc. The more the application dries, the more smoothing/shaping you can do. Kev went back and smoothed the surfaces a few times throughout the process. It will never become perfectly smooth like a countertop, but it will be decently flat after a few rounds of wood float. You want it to be a little “messy” – that’s the look. Use the corner trowel to smooth out the edges to remove sharp corners. When it’s close to being dry, use a trowel to run along the bottom edge to smooth out and cease the dripping.
Top:
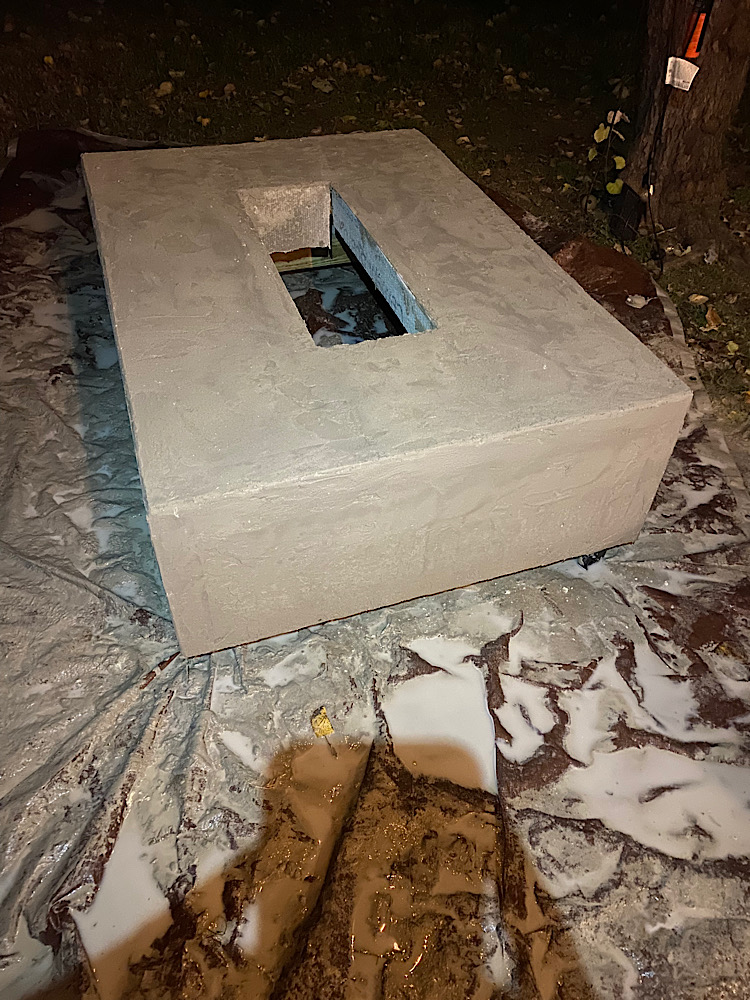
The top is easier because you can pour the mixture directly onto the surface. Use the trowels to spread it out, but be careful towards the edges as to not undo your corner work. During this same step you should add concrete to the center where the fire pit drops in (it doesn’t have to be beautiful because no one will see it, but it should be done to protect the screws from heat and to allow the fire pan to drop in).
About 30 min after applying the top/internal concrete, drop the pan in to make sure it fits. If it doesn’t, this is your only opportunity to sand it down or add more to create or eliminate space. Most concrete will dry within an hour, so keep your eye on the clock.
*Concrete is a natural heat deflector so all wood and surfaces should be covered.
**Make sure cement doesn’t dry and harden onto the wheels. Kevin constantly sprayed and soaked the wheels to ensure this didn’t happen.
***Concrete work should not be done under 40 degrees because it will freeze. However, given that you are also working with water, you may want to do this on a warmer day to avoid getting a cold like sweet Kevo did.
Let it sit to dry overnight. be careful placing heavy items onto the surface over the next few days. It will be hardened after about 2 hours, but not completely dry. You will apply the cement sealer after a minimum of 20 days drying time.
Make it Hot
Use a professional to set up the fire pan to the gas line. There are online resources to read about the process if you’re curious, and to find someone local to set it up for you.
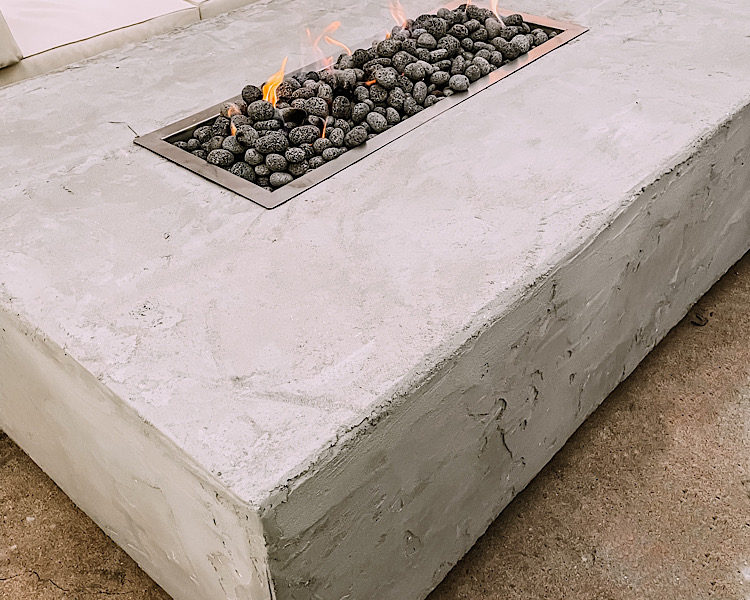
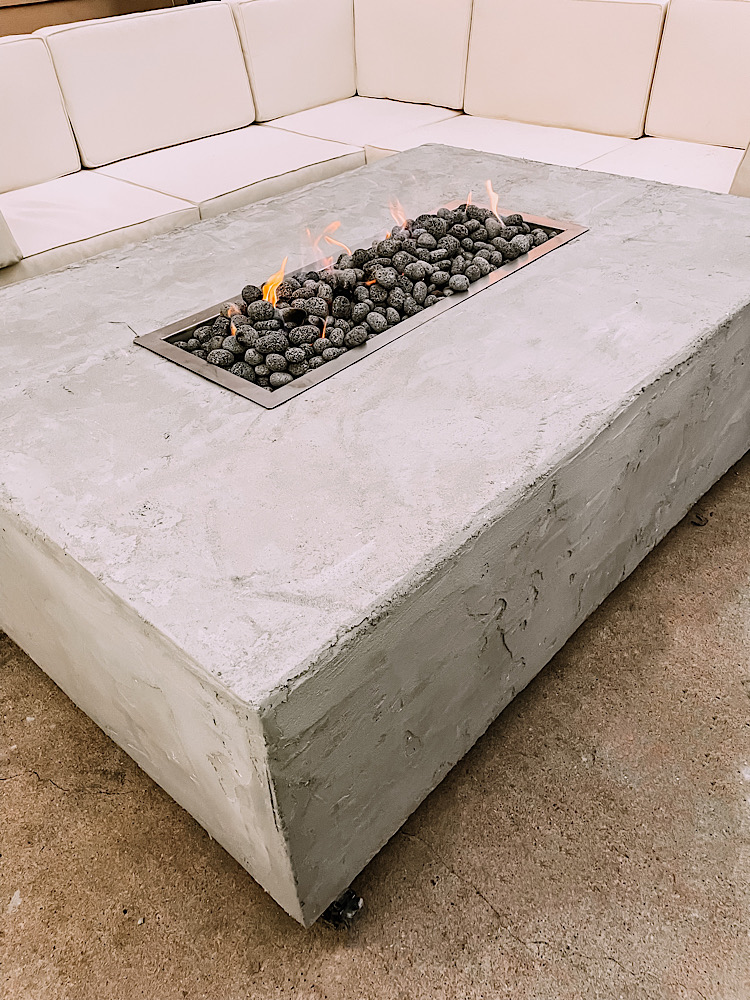
Once a professional has set up your gas lines and connected them to your fire pit, you can fill the pan with your lava rocks or fire glass, and enjoy your DIY concrete fire pit!
CAUTION: Installing gas appliances can be dangerous. Installation must be made by a professional gas installer to ensure the safe operation of your burner. We advise working with a certified NFI Gas Specialist. Search for your local specialist at: https://www.nficertified.org/public/

What insert was used in this table? Where would your hubby recommend buying the insert from?